How To Install XP Onto USB Thumb Drive
 This article is not about installing from a USB device, we’ll show you how to actually install a full working version of Windows XP onto your USB thumb drive.
If you are searching for how to install Windows XP using a thumb drive instead of a CD-Rom, click here for XP USB Install.
Whenever Windows gets into a blue screen of death or endless reboot loop after a series of repairs done because of a virus infection, the feeling is devastating. So much effort that has been put into working on the reports or files that are still in the computer may be gone for good.
If only you still have the chance to get them out, Just give you one day back in time and you will swear to god that you will backup everything. All you ask for is just one or two files. What if I told you that you can install one functioning Windows XP into a thumb drive and keep it safe somewhere? When the day disaster strikes, simply take it out and hook up to the computer. You will have one functioning Windows XP running right from the thumb drive or external storage. And I am not talking about the BartPE live CD. It is one whole full Windows XP running right off a thumb drive.
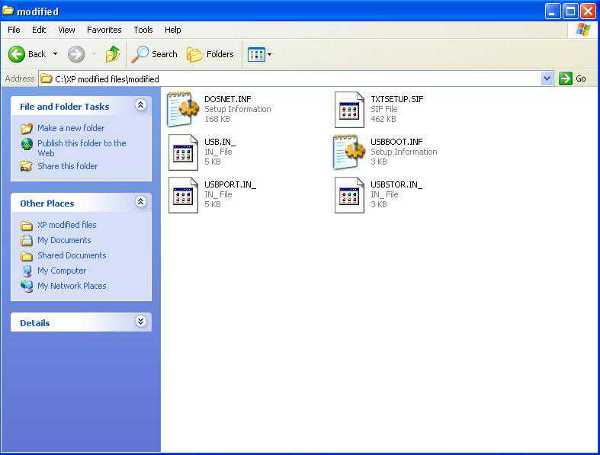
To make things real simple, I have already prepared those files that require modification ready made and can be downloaded. You will need to replace these specific files and overwrite the ones that are in your original Windows XP CD and re-package it in order for the magic to work. Download and unzip this file.
Put those files aside first. Now you will need to copy the whole contents of your Windows XP CD to a folder. You will need to replace these files from I386 folder, actually they are the ones that you have downloaded. Do note that it is important that the files stay in full caps and it has replaced the old files. It is possible for both files to exist in the same place with one in upper case and the other in lower case. If the files end up in lower case, the whole thing will not work as well.
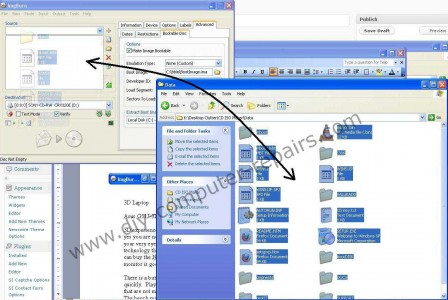
Once you have replaced those files with the ones that I have created, it is time to re-pack everything back. You can use programs like magiciso or other equivalents to compile the files back into a single ISO file. Or you can use this Imgburn program. Start the Imgburn program. Select “Write files / folders to disc”. Now you will see the main interface. Click on the “Advanced” tab, then click on the “Bootable Disc” tab. Put a tick on “Make Image Bootable”. Click on the browse icon and select your boot file.
Note that you will need to insert this XP boot.img file first before you burn the CD or it will not be bootable.
Now drag and drop the contents of your modified XP into imgburn program. Insert a blank disc and burn. Use a CD that has 700 meg as the file size is quite big.
Click for larger image
Click on burn and the disc will be created. Imgburn will prompt you for suitable adjustments to the disc profile. Say yes to those suggestions.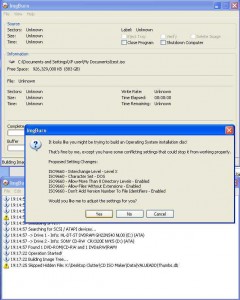
Click for larger image
Before you install, you will need to prepare your thumbdrive. Download this format utility file. Hook up your thumbdrive, start this program and format it to NTFS.
Now in order to avoid any accidental overwriting of your current Operating System, shut down your computer and unplug all hard disks. Just unplug the power cable and it will do just fine. Also unplug any devices that are assigned any drives, like printers, external hard disks or even multi-card readers and mobile broadband dongles. This has to be done to ensure that the thumb drive gets allocated the C:. Or else the installation will not be able to get through.
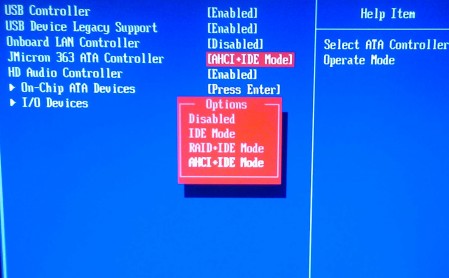
You can now proceed with the installation as you would by setting the boot sequence to boot off from CD, for users who are unable to boot off this bootable CD, search the Bios setup page for a setting called AHCI. You will need to activate that. If you are successful, the message to hit any key to start should show. You will see that the C: is now your thumb drive and just go through the whole installation. The entire procedure is pretty similar to what is shown in this article.
Click for larger image
The only problem is that the whole damm installation is bloody slow. Just copying of the files before the first reboot takes 30 to 45 mins and the whole installation takes all the way to around 5 hours. This is because the thumb drive does not have any “paging files”.
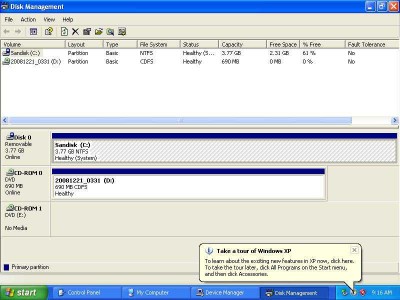
But the good news is that once the installation is complete, the startup is decent. Just remember to hook up your main hard disk back on when the thumb drive Windows is running and it will allocated swap file using your main hard disk. Everything will be much faster after that. But it still feels like running Windows XP on a Pentium 1 CPU. Here’s the image of the screen shot taken inside the Windows XP running from a thumb drive. It clearly shows that I do not have any other hard disk apart from a 4 Gig Sandisk Cruzer thumb drive.
Click for larger image
One tip that I recommend users is to use clone software to clone the thumb drive out to a file. Since the thumb drive is only 4 Gig, you can burn the cloned image to a DVD and keep it. So when you need the portable Windows XP, just clone it back to any thumb drive. You do not need to go through the painful 5 hours again. I hope this article on how to install XP to USB will be helpful to readers. I have only tested in in a thumb drive. Readers who have tested this out in other external storage, please post the results of your outcome, if a certain USB hard disk is able to boot up fast, this is one very useful portable Windows XP that can come in handy in a disaster.
No comments:
Post a Comment