Search in uioop.blogspot.com

Blog Archive

Tuesday, May 31, 2011

BlueStacks Brings Android Apps / Games To Your Windows PC [Video Demo]

SOURCE: http://www.redmondpie.com/bluestacks-brings-android-apps-games-to-your-windows-pc-video-demo/

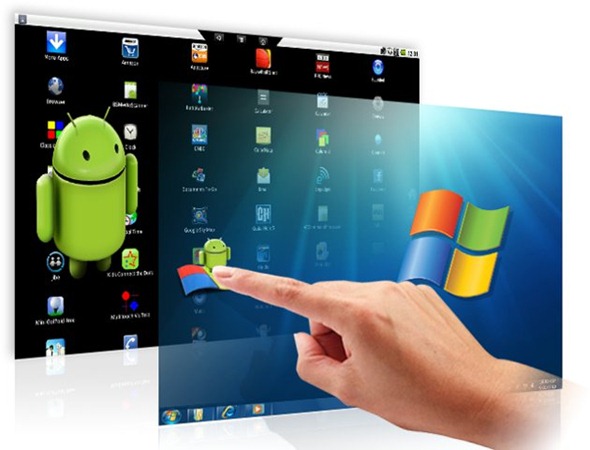
BlueStacks, the Android runtime development environment could be turned into a viable business after the company received $7.6m in Series A funding and has now signed a partnership with Citrix.
BlueStacks

BlueStacks got its first public demonstration this week at the Citrix Synergy conference, with the BlueStack-Citrix partnership allowing the software to be delivered through the Citrix Receiver showing just one of the ways BlueStacks could be put to practical use rather than being just another cool Android development tool.

What makes BlueStacks so exciting is the way it can replace the current Android emulation that developers must currently use to test their apps inside Windows. Current emulation methods cause their own inherent problems, such as degraded performance – problems that no longer exist when using BlueStacks according to Ars Technica.
bluestacksdevice

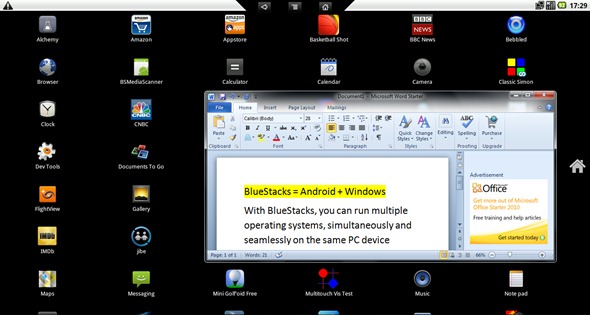
As most Android application developers know, running Android software on a Windows PC has historically involved emulation—which impairs performance and adds considerably to resource overhead. BlueStacks has overcome the performance barrier by building a native x86 Android runtime that doesn’t have to rely on emulation. The company says that Android applications running on its stack will be highly responsive on Windows and won’t suffer from the kind of lag that developers are accustomed to experiencing when using Google’s emulator.

In an interview with BlueStacks CEO Rosen Sharma, Ars Technica were told how the software developers working on the project have been working tirelessly to make the stack as seamless as possible in order to make Android apps feel just like native Windows software when being used. An added beauty to the whole system is the fact Android apps coded for the operating system’s native APIs don’t need to be re-written in any way, removing another barrier for developers.
6 bluestacks word

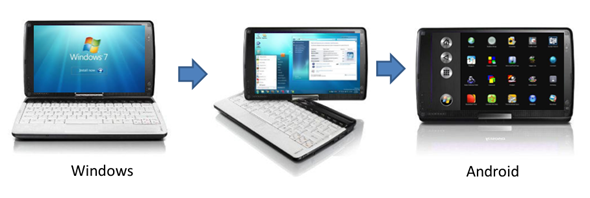
Sharma goes on to say that the company hopes that one day mobile devices such as convertible notebook computers could come pre-loaded with both Windows, and Android applications that would come into play when the machine is converted into a tablet.

BlueStacks could add an interesting new twist to the fight for mobile OS supremacy, bringing Android’s apps to the world of Windows
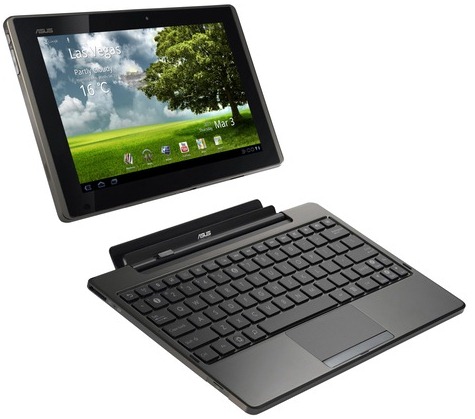
[ASUS] Overclock Asus Eee Pad Transformer Android Tablet To 1.6 GHz [How To Tutorial]


Asus Eee Pad Transformer is perhaps the most “wanted” Android tablet as retailers went out of stock within a week of initial launch. The credit for this massive demand for Eee Pad Transformer goes to an easy root with some awesome DIY docks and hacks that unleashed the true potential of this device.

Also, due to huge development support present at XDA and other Android forums, there are some custom kernels available that not only help overclock your Eee Pad, but also optimize the overall performance of thistablet.

ASUS_EeePad_Transformer_

For those of you who don’t know, Overclocking and Undervolting kernels are developed by Android hackers in collaboration with community to maximize or minimize the processor speed of your device. Most of the times, these custom kernels are stable but as it is direct tinkering with your device’s hardware, there can be backlashes as well. It is important to understand all associated risks before attempting to Overclock or Undervolt any Android device.

So let’s cut the rant short and learn how we can Overclock our Asus Eee Pad Transformer Android Tablet to a whooping and stable 1.6 GHz.

Requirements:

How To:

  1. The first step is to make sure that you have root on your Eee Pad with Recovery installed. You can head to the official XDA rooting thread posted here and click here for installing Recovery. I believe that after rooting , you can install ROM Manager from Android Market and flash a compatible ClockWorkMod Recovery.
  2. Now download Custom Overclocking Kernel for Asus Eee Pad from requirements section above and save the zip file on your desktop.
  3. After this connect your tablet to the computer and mount SD Card as Disk Drive.
  4. Now reboot your Asus Eee Pad Transformer in Recovery. You can either reboot by powering off your device and then use the button combination or use ROM Manager.
  5. Once you are in Recovery, make a Nandroid backup by navigating down to Backup / Restore option. It isn’t necessary but this backup will be your only way out if things don’t quite work as planned.
  6. After you are done making a backup of your current Firmware, go to recovery main menu and select Install Zip From SD Card.
  7. Now in the resulting menu, select the TF101-05-27-0620-SPICY-MEATABALL.zip and flash.
  8. Wait for the installation / flashing procedure to complete and then reboot your device.
  9. Once the device reboots, go to Android Market and download SetCPU.
  10. Now launch SetCPU and scale the processor according to your choice. Please note that keeping your processor speed to max i.e. 1.6 GHz can reduce battery life.

And there you go! Your Eee Pad should now be running at 1.6 GHz! In case you are stuck or need more information, then head to official XDA thread posted here.

Thursday, May 26, 2011

Where is log file for chkdsk for Windows XP?

Event Type: Information
Event Source: Winlogon
Event Category: None
Event ID: 1001
Date: 7/9/2003
Time: 11:43:17 AM
User: N/A
Computer: WINDOWSXP
Description:
Checking file system on C:
The type of the file system is NTFS.
Volume label is CHEETAH.

A disk check has been scheduled.
Windows will now check the disk.
Cleaning up minor inconsistencies on the drive.
Cleaning up 34 unused index entries from index $SII of file 0x9.
Cleaning up 34 unused index entries from index $SDH of file 0x9.
Cleaning up 34 unused security descriptors.
CHKDSK is verifying file data (stage 4 of 5)...
Read failure with status 0xc000009c at offset 0x582c5ca00 for 0x10000
bytes.
Read failure with status 0xc000009c at offset 0x582c66200 for 0x200
bytes.
Windows replaced bad clusters in file 121
of name \WINNT\MEMORY.DMP.
File data verification completed.
CHKDSK is verifying free space (stage 5 of 5)...
Free space verification is complete.
Adding 1 bad clusters to the Bad Clusters File.
Correcting errors in the Volume Bitmap.
Windows has made corrections to the file system.

28290433 KB total disk space.
27244554 KB in 56921 files.
18524 KB in 3876 indexes.
0 KB in bad sectors.
135639 KB in use by the system.
65536 KB occupied by the log file.
891715 KB available on disk.

512 bytes in each allocation unit.
56580866 total allocation units on disk.
1783430 allocation units available on disk.

Tuesday, May 24, 2011

[Hardware] X58平台怎么跑1333MHz记忆体?

[SAMSUNG] Unlock Samsung Galaxy S II With SIM Unlock Code Finder App [How To Tutorial]


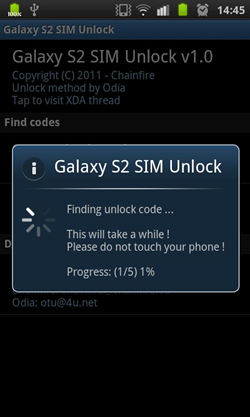
If you got your Samsung Galaxy S II with a SIM lock, meaning that your carrier barred your phone from using any other company’s SIM card, then there is some great news for you! There is now a free app available in Android Market that searches for your Samsung Galaxy S II’s SIM unlock code. Apart from this, the app can also find unfreeze code that might help if running SIM unlock code search feature lands your phone in an unresponsive state. Samsung Galaxy S II SIM unlock code finder is based on XDA developer Odia’s mode and has been compiled plus released in Market by Chainfire.

sim-unlock-sgs2-2

The procedure is simple and all you have to do is follow the instructions below to SIM unlock your SGS II:

sim-unlock-sgs2 sim-unlock-sgs2-1

  1. The first step is to download SGS2 SIM Unlock Code Finder from Android Market on your phone. In case you aren’t located in US or this app doesn’t show up in searches, then use Market Enabler app to enable any US Market.
  2. Once you have downloaded the app, launch by tapping it from your homescreen.
  3. Now simply tap on Find SIM unlock code button and wait for the app to search for it.
  4. Once the code shows up, write it down on a piece of paper or anywhere you like.
  5. Power off your device, insert some other carrier’s SIM card and reboot your device.
  6. Now the phone will prompt your for an unlock code.
  7. Write the code you previously noted down and wait for the SIM unlock to happen.

And if you are successful and your code is right, you will now have a SIM unlocked Samsung Galaxy S II. Please note that Chainfire has categorically asked users to avoid redoing the procedure if it doesn’t unlock or gives a wrong unlock code. Repeating this procedure might end up your SGS II in a freeze state, and you might have to use the same app for Unfreeze code. For more details, support and feedback, you can visit the official XDA thread.

Sunday, May 8, 2011

12 Things I did After Installing New Ubuntu 11.04 "Natty Narwhal"

http://www.techdrivein.com/2011/04/12-things-i-did-after-installing-new.html

Ubuntu 11.04 Natty Narwhal released, reviewed. Ubuntu 11.04 Natty Narwhal beta is already here and in a few days time, the final release will happen. We have already reviewed the latest Ubuntu 11.04 and we think it is ready for prime time, well, almost. We did encounter some amount of instability in the new Ubuntu Unity mostly because of Compiz, but overall we believe Ubuntu 11.04 is going to be a release to look forward for. Leaving all that aside for now, let's just concentrate on things you could do after installing Ubuntu 11.04 Natty Narwhal.

to do list after installing Ubuntu 11.04 Natty Narwhal

Things to do After Installing Ubuntu 11.04 Natty Narwhal
Many things about this post will be similar to our previous write up on things you need to do after installing Ubuntu 10.10 Maverick Meerkat. But not everything. Ubuntu with classic GNOME desktop is now defunct and Ubuntu Unity has come to replace it. Unity is the new face of Ubuntu and there will be no more special desktop and netbook editions of Ubuntu. Instead, Ubuntu Unity will simply took its place. Now, let's take a look into the things you need to do after installing Ubuntu 11.04 Natty Narwhal.

Installing Restricted Extras and Updating Repositories During Ubuntu Installation
  • You can now install restricted codecs package(which include Adobe Flash, MP3 codecs and such) during installation of Ubuntu OS itself.
Things to do After Installing Ubuntu 11.04
  • Notice the arrows pointing to the boxes in the screenshot above. If you tick both of them during the Ubuntu installation process(make sure you are connected to the internet before doing so), restricted extras package will be installed automatically and you will be able to play mp3's and watch flash videos(YouTube videos for example) out of the box.
  • But there is a catch. If you have a slow internet connection(which is very rare these days), ticking the boxes shown in the screenshot above will unnecessarily lengthen the installation process. I for one prefer to do all that after installing Ubuntu. If you are like me, the next two steps are for you.
Update Repositories
  • After you install brand new Ubuntu 11.04, the first thing you need to do is to update repositories and make sure you have the latest updates installed(Like I said before, you need to do this only if you haven't ticked the boxes shown in the above screenshot).
  • Open Terminal(Ubuntu 11.04 Keyboard Shortcut: Ctrl + Alt + T) and copy-paste the following command into Terminal.
sudo apt-get update && sudo apt-get upgrade
  • Done. Ubuntu repositories have been successfully updated.
Install Ubuntu Restricted Extras
  • Install the "ubuntu-restricted-extras" package. This will enable your Ubuntu to play popular file formats like mp3, avi, Flash videos etc. Click Here OR simply copy-paste the command below into Terminal to install the package(You need not do this also if you have ticked the 'right' boxes).
sudo apt-get install ubuntu-restricted-extras
  • Done
Enable Full DVD Playback(Dual Layer DVD Support)
  • Though installing the restricted extras package will solve most of your problems, you may not be able to play dual layer dvds yet in your Ubuntu.
  • For that, you need to install libdvdcss2 package from medibuntu repositories. Simply do the following in Terminal.
sudo wget --output-document=/etc/apt/sources.list.d/medibuntu.list http://www.medibuntu.org/sources.list.d/$(lsb_release -cs).list && sudo apt-get --quiet update && sudo apt-get --yes --quiet --allow-unauthenticated install medibuntu-keyring && sudo apt-get --quiet update sudo apt-get install libdvdcss2
  • Done.
Check For Availability of Proprietary Hardware Drivers

Things to do After Installing Ubuntu 11.04
  • In my case, all the hardware drivers including graphics, sound and wireless drivers were enabled automatically. But this may not be the case with everyone.
Things to do After Installing Ubuntu 11.04
  • If you are among the not-so-lucky, open Applications dash from Unity dock (Ubuntu 11.04 Keyboard Shortcut: Super + a) and select 'Additional Drivers' application(see the highlighted app in the screenshot).
  • Check for additional drivers available and activate the ones you want. In 90% of the cases, this will do the trick. Those who were not able to get their hardware drivers enabled yet will have to do fair amount of digging through ubuntuforums.
Install Compiz Config Settings Manager

Things to do After Installing Ubuntu 11.04
  • Compiz desktop effects are available in your Ubuntu by default and if you have any kind of 3D acceleration available(graphics driver ie), you are good to go with Compiz.
  • Now to tweak Compiz desktop effects in Ubuntu, you need to install "compizconfig-settings-manager" package. Click Here OR simply copy paste the following command into Terminal to install "compizconfig-settings-manager".
sudo apt-get install compizconfig-settings-manager
  • Done. Compiz Config Settings Manager(CCSM) is significant as far as Ubuntu 11.04 Natty Narwhal is concerned. We will get to that later on.
Essential Ubuntu Unity Keyboard Shortcuts
  • Productivity can be increased significantly in new Ubuntu Unity desktop if you know the essential Unity keyboard and mouse shortcuts.
Enable Transparency of Unity Top Panel
  • Launch CCSM. Hit Super + a and search for CCSM.
Enable Transparency of Unity Top Panel
  • After launching CCSM, select Ubuntu Unity Plugin from 'Desktop' category. Now choose the Experimental tab from above.
  • There you will see the 'Panel Opacity' option. Change it to the value you like.
Increase/Decrease the Launcher Icon Size
  • Just as before, Launch CCSM(Super + a and search for CCSM) and then browse to Ubuntu Unity Plugin. Choose 'Experimental' tab.
Increase/Decrease the Launcher Icon Size
  • Adjust the value of 'Launcher Icon Size' by simple scrolling. The default value of 'Launcher Icon Size' is 48, but I like it around 40.
Change Desktop Size

Change number of workspaces in Ubuntu natty
  • By default, Ubuntu 11.04 Natty Narwhal gives you four workspaces to play around. Keyboard shortcut for activating the four workspaces is Super + s. Now, if you want to increase/decrease that number do the following.
  • Launch CCSM yet again, and select General Options from the category 'General'. Select the tab 'Desktop Size' and choose the values you want. Simple as that.
Install Nautilus-Elementary in Ubuntu 11.04 Natty Narwhal

Nautilus-Elementary in Ubuntu 11.04
  • I can't use Nautilus these days without implementing the improvements brought about by the Nautilus-Elementary hack. So here is how you install Nautilus-Elementary in Ubuntu 11.04 Natty Narwhal. Also read our Nautilus-Elementary in Ubuntu 11.04 review.
  • Copy paste the following commands into Terminal to install Nautilus Elementary in Ubuntu 11.04 Natty Narwhal.
sudo add-apt-repository ppa:am-monkeyd/nautilus-elementary-ppa sudo apt-get update && sudo apt-get upgrade nautilus -q
  • Done. If sudo apt-get upgrade doesn't work, try sudo apt-get dist-upgrade instead of it.
Install Some Incredible Themes in Ubuntu 11.04

Equinox Evolution themes + Faenza icon theme in Ubuntu 11.04 Natty
  • For me, nothing beats Equinox Evolution themes + Faenza icon theme combination. As an added advantage, both are available from the same PPA as well. Latest Equinox Evolution themes update brings with 3 new themes taking the total count to 5.
  • To install Equinox GTK theme collection and Faenza icon theme in Ubuntu 11.04, you need to do the following in Terminal.
sudo add-apt-repository ppa:tiheum/equinox sudo apt-get update sudo apt-get install gtk2-engines-equinox equinox-theme faenza-icon-theme
Top Additional Applications to Install After Installing Ubuntu 11.04

Top Applications for Ubuntu 11.04

Top additional applications I install after installing Ubuntu hasn't changed much from last time. But this list is subjective and depends largely on personal preferences. Anyways, here is mine.
Want a more elaborate list? Here is a good collection of top 18 applications you need to install and experience after installing Ubuntu. Hope you enjoyed the list. Thanks for reading.

AVG Internet Security 2013

Total Pageviews

Contributors